moxsoar
![]()
Navigation
Overview
Getting Started
Creating Content
Advanced
Request Logging/Elasticsearch
Version Control
Request Tracking
Elasticsearch
Moxsoar uses Elasticsearch to perform request tracking. Request tracking logs all HTTP requests, including the body and headers, as Elasticsearch documents so they can be later searched.
You can run Moxsoar without Elasticsearch if you do not need to track requests.
Quickly Running Elasticsearch
Elasticsearch is not part of Moxsoar, and the intricacies of setting up a properly configured elasticsearch instance is out of the scope of this documentation.
However, for convienance, this repo provides a simple docker compose file that will start Elasticsearch and Kibana 7.8 quickly for you.
You can run it on any host with docker-compose installed:
wget -O ./docker-compose.yml https://raw.githubusercontent.com/adambaumeister/moxsoar/master/docker-compose.yml
docker-compose -f ./docker-compose.yml up
After starting, you must set the built in passwords for Elasticsearch. The following command sets them interactively.
docker-compose exec elasticsearch ./bin/elasticsearch-setup-passwords interactive
After setting your password in Elasticsearch, pass it (and the Kibana user) as environment variables in the docker compose file.
     environment:
      - ELASTICSEARCH_USERNAME=kibana_system
      - ELASTICSEARCH_PASSWORD=[ your password here ]
docker-compose -f ./docker-compose.yml restart
After these steps have been configured, you can login to Kibana, which by default will listen on tcp/5201 (no TLS!)
Configuring Elasticsearch in Moxsoar
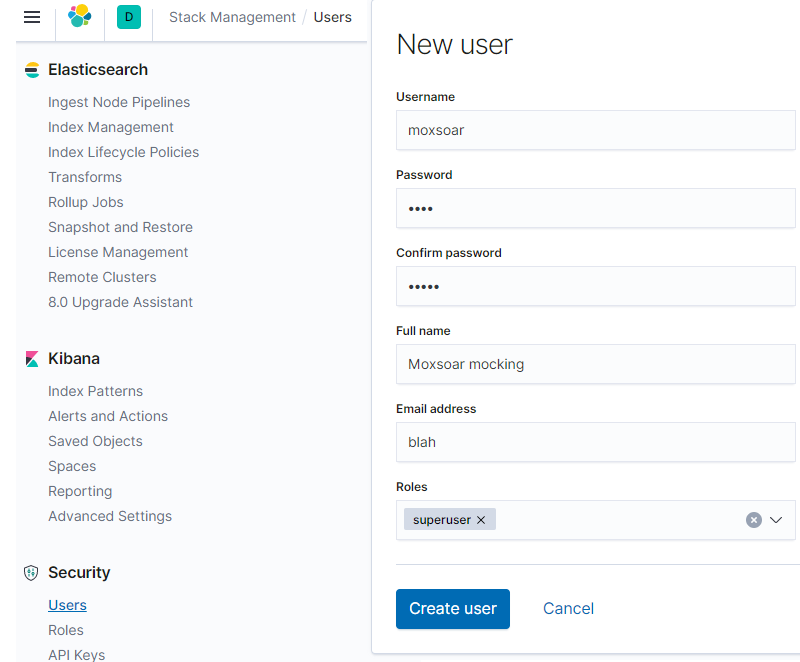
To connect Moxsoar to Elasticsearch, you must create a user for it. Simply navigate to Stack Management->Security->Users and create a username/password combination. For one-off deployments or quick setups, you can set the role to superuser.
You can now configure Moxsoar to talk to Elasticsearch!
From the Moxsoar UI, you will see a yellow ! which indicates the Elasticsearch instance is not connected. Click the settings icon and configure the Elasticsearch paramaters:
- Elasticsearch username/password - these are the values you just configured.
- Elasticsearch address - By default, the elasticsearch server listens on port 9200.
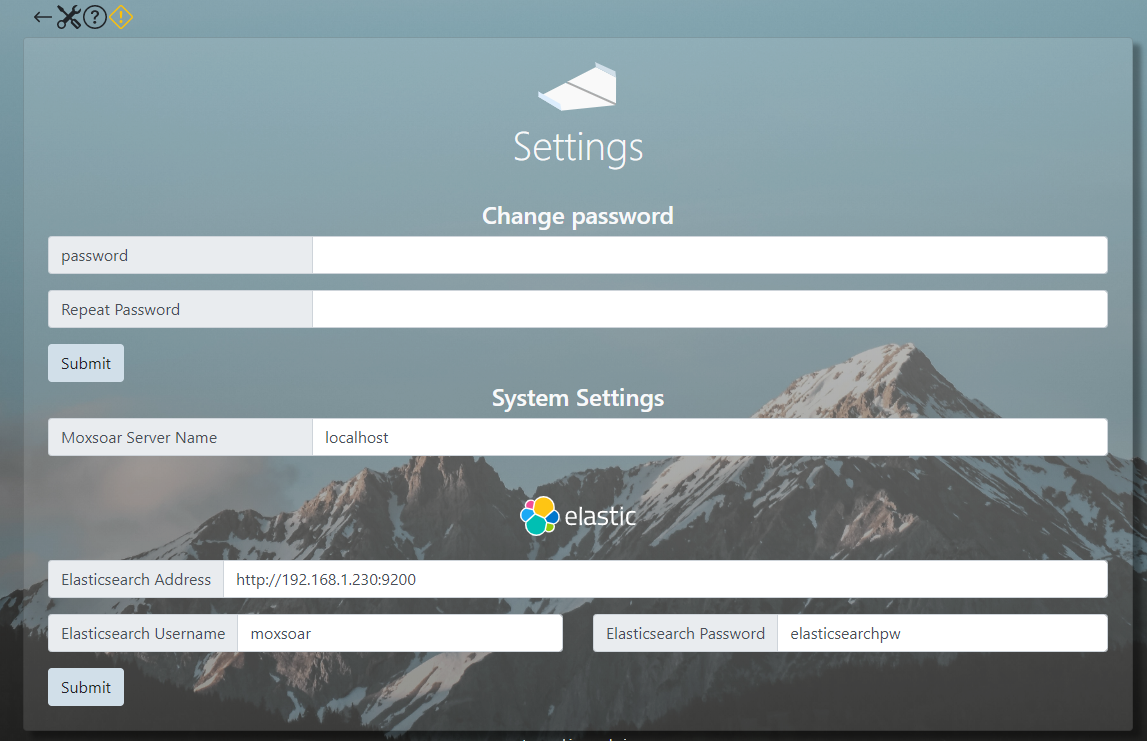
The yellow exclamation should be replaced by a green tick, and it’s done! Moxsoar will now forward all requests to Elasticsearch.
Creating an Index Mapping
To make the moxsoar data visible in Kibana, you must create an Index Pattern.
Under Settings->Kibana->Index Patterns you can create an index pattern that matches the moxsoar_tracker_idx index.
Moxsoar uses the field called timestamp for the obvious task of timestamping the data - ensure that this is selected when presented with the option.
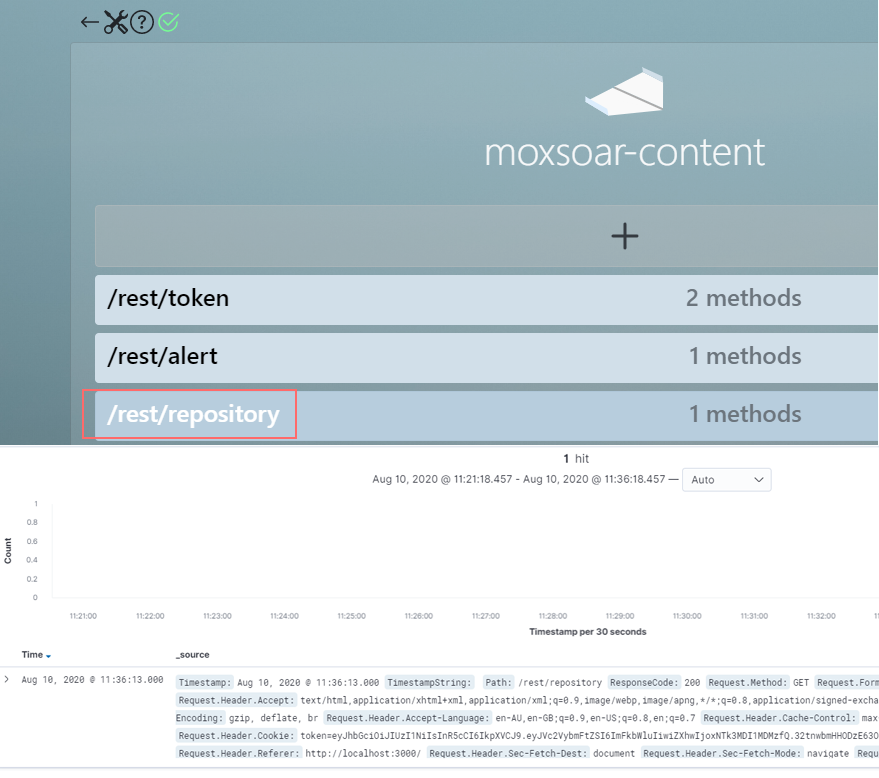
Viewing your data!
Send a basic request to one of the mock integrations you have configured. You can do this by clicking on a path within the Moxsoar UI. You will immediately see the request appear in the Kibana Discovery page with all the information.
Note that this request log will include your access token to the moxsoar UI if you use this method.